L-Bar Sealer | Desk Top L Bar Heat Sealer | shrink Film L-Sealer
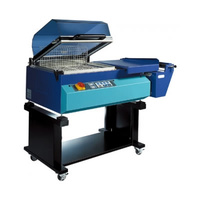
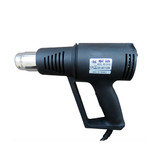
L-Bar Sealer with heat gun film dispenser
L-Bar Sealer | Desk Top L Bar Sealer
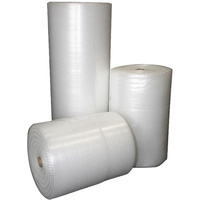
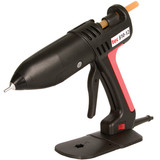
This desk top L style heat sealer is most suitable for low volume users who require shrink wrapping. In conjunction with shrink film (sold separately) it is used to provide a plastic bag around your product which is then "shrunk" through the use of a heat gun (sold separately) to shrink the film around the item. This model has a sealing area of 350mm x 510mm (4-GP350), or 550mmx 600mm (4-GP550). How does it work? The L-Bar Sealer provides an L shaped heat seal around your package - effectively sealing two sides of the film. The Shrink film is centrefolded on the roll - which means it is folded in half then rolled onto the roll so when you slip your product between the shrink film you already have one enclosed edge. After you seal around your first product this will provide the second sealed edge for proceeding products. From this point on there will only ever be two edges (L-shaped) requiring sealing.
Follow this link to view the Film Roll Dispenser.
If you are after a budget alternative to the L-Bar Sealer, you may wish to consider the Shrink-A-Pack that seals only one side (instead of two), so requires you to make an additional seal and the heat gun comes with it. It is available in a range of sizes.
.jpg)
IMPORTANT POINTS ON USING HEAT SEALERS
A guide to prolonging the life of Heat sealers elements and Teflon strips etc.
1. Set sealing time to as LOW as needed (the minimum time needed to seal) to reduce the wear and tear of the heat elements and Teflon strips, allowing them to last longer.
Note: The jaws will get increasingly hotter with continuous sealing done quickly. It is necessary to keep decreasing the sealing time to the lowest setting needed during the use.
2. Do not continuously press the handle arm (or the foot pedal) more than once to make a seal. The longer the time between each seals, the longer the sealing wire or element will last.
Recommendation: Leave at least ten seconds between each seal.
3. Keep pressing the handle arm (or the foot pedal) firmly for a moment after the signal light (or the beep sound) goes out to allow the plastic film to cool. (For automatic sealer, set the cooling time longer than sealing time).
Note: This does not apply to Shrink-A-Pack system and sealers with round sealing wire.
4. Do not use the seal wire (standard flat ones) to cut plastic bags. Please call the Get Packed office for a round or cutting wire.
5. To avoid shorting and breaking the heat elements, check or replace lower Teflon strip (s) if they are burned out. The lower Teflon strip (s) is located under the heat element and must be longer than base.
Note: it is recommend to use two strips of Teflon, so when the top one burns out replace it without damaging the Teflon under neath protecting you sealing rubber or pad.
6. Do not exceed the operating limitations of the heat sealers (each type of heat sealers have different maximum seal thickness) as they are designed to only seal certain types of bags or film.
Note: Consult with a qualified sales person at Get Packed on the purchase of suitable heat sealers especially when using foil bags, paper bags, folded bags (more than two layers) etc.
7. Face the plastic side down and paper side up when using sterilisation bags for sealers with element on lower jaw. Change the direction of the sterilisation bags for sealers with element on upper jaw. The kind of bag is not recommended for most impulse heat sealers.
8. Change the upper Teflon Strip when it has burned or worn out. Do not use the machine without changing or using the Teflon Strip (s).
9. Do not use non-standard elements, Teflon strips etc. as they might cause damage to the machine.
Ensure the machine is serviced and adjusted by qualified personals regularly.
Be The First To Review This Product!
Help other Get Packed Pty Ltd users shop smarter by writing reviews for products you have purchased.
We Also Recommend
You May Also Like
Others Also Bought
More From This Category

Shrink Wrap Machine - 4-GPEKH-346 - All In One Shrink Wrapping Machin
Price on Application

Poly Tubing Foot Sealer and Cutter - Impulse Heat Sealer - Bag Sealer
Price on Application

Shrink Wrap Machine - 4-GPEKH-680 - All In One Shrink Wrapping Machin
Price on Application


